A 15-minute core workout at home with zero equipment: 6 bodyweight moves in a timed circuit, with beginner modifications, form cues, and a work/rest plan.
Core Workout at Home With No Equipment (15 Minutes)
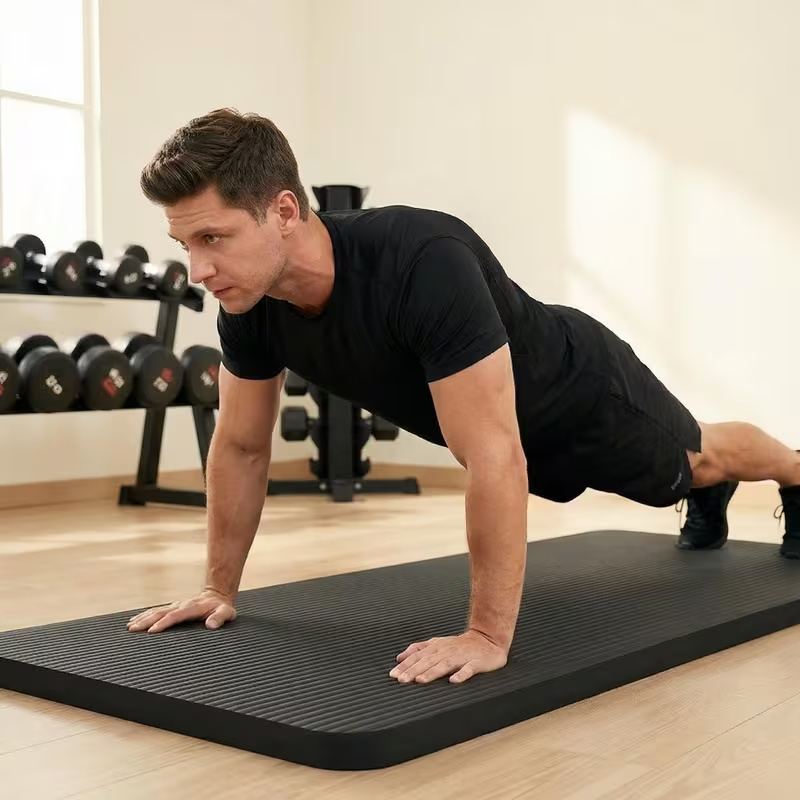
You do not need a gym, a dumbbell, or a resistance band to build a stronger core. Your bodyweight — moved slowly and deliberately — is a complete training tool. This 15-minute circuit trains every core function using six exercises you can do on any open patch of floor.
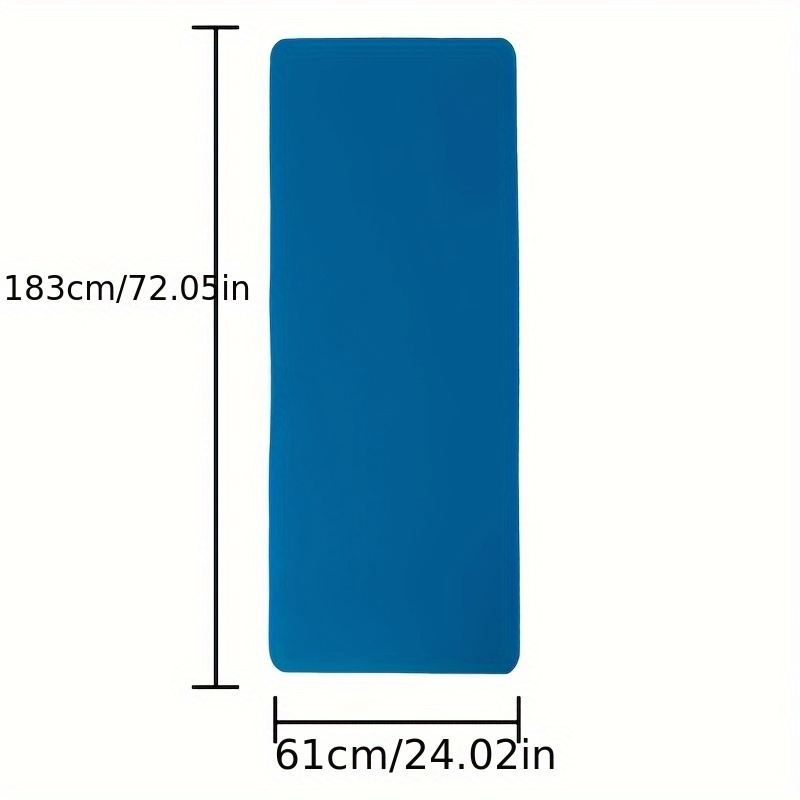
All you need is a comfortable surface. A cushioned mat like the Thickened 10mm Fitness Yoga Mat above protects your spine and knees through planks and floor work — and if you prefer something lighter to roll out anywhere, the 8mm Non-Slip Sports Yoga Mat works just as well for this routine.
This guide contains affiliate links. If you buy through them, VÉLORA may earn a commission at no extra cost to you.
How This Workout Works
- 6 exercises, performed as a circuit.
- Work 40 seconds, rest 20 seconds per exercise (beginner option: 30 seconds work, 30 seconds rest — see modifications).
- 2 rounds through the circuit, with 60–90 seconds of rest between rounds.
- Total time: about 15 minutes including warm-up.
Move with control, not speed. Exhale on the effort of each rep, inhale on the return, and keep a gentle brace (about 20–30 percent tension) through every exercise. New to bracing? Our Core Workout for Women Beginners teaches it step by step.
One honest note: this workout builds genuine core strength, stability, and posture. It does not selectively burn fat from your waist — no exercise can spot-reduce. Pair consistent training with overall activity, sensible nutrition, and sleep; results vary from woman to woman.
Warm-up (2 minutes): March in place for 30 seconds, 10 slow bodyweight squats, 10 arm circles each direction, and 30 seconds of 360-degree breathing on your back (belly, sides, and ribs expanding on the inhale).
The Circuit at a Glance
| # | Exercise | Work | Rest | Main Focus | Difficulty | |---|---|---|---|---|---| | 1 | Dead Bug | 40 sec | 20 sec | Deep core, anti-extension | Beginner | | 2 | Knee Plank Hold | 40 sec | 20 sec | Full-trunk bracing | Beginner | | 3 | Bird Dog | 40 sec | 20 sec | Back-side core, balance | Beginner | | 4 | Side-Lying Hip Dip (Knee) | 40 sec/side | 20 sec | Obliques, lateral stability | Beginner–Intermediate | | 5 | Slow Bicycle Crunch | 40 sec | 20 sec | Obliques, rotation | Beginner–Intermediate | | 6 | Glute Bridge March | 40 sec | 20 sec | Glutes + core coordination | Beginner |
Rest 60–90 seconds, then repeat the full circuit once more.
Exercise-by-Exercise Guide
1. Dead Bug
Purpose: Teaches your deep core to stay braced while your limbs move — the foundation of a protected spine.
Starting position: Lie on your back, arms reaching toward the ceiling, knees stacked over hips with hips and knees at 90 degrees.
Technique: Press your lower back gently into the floor and brace. Exhale as you slowly lower your right arm overhead and extend your left leg toward the floor — only as far as your back stays glued down. Inhale back to the start, then switch sides. Slow and continuous.
Breathing: Exhale on each extension, inhale on the return.
Beginner modification: Move only the arms, keeping both feet on the floor — or keep the extending leg bent.
Common mistakes: Letting the back arch off the floor (the one rule that matters), rushing, and straightening the leg so far the brace collapses.
2. Knee Plank Hold
Purpose: Builds full-trunk bracing endurance with less load than a full plank.
Starting position: Forearms on the floor, elbows under shoulders, knees on the mat, body in one long line from knees to head.
Technique: Before the clock starts, brace: firm waist, ribs drawn slightly down (not flared), glutes squeezed, neck long. Breathe steadily behind the brace — short, calm breaths that never release the tension.
Breathing: Continuous, even breathing throughout the hold.
Beginner modification: A wall plank — hands on a sturdy counter, body at an angle — uses identical mechanics with minimal load.
Common mistakes: Holding your breath, hips sagging or piking, shoulders shrugging toward ears. If your lower back aches, the hold is over — rest and go again next round.
3. Bird Dog
Purpose: Trains the back-side core and teaches your trunk to stay level while limbs move.
Starting position: On all fours — wrists under shoulders, knees under hips, back flat like a tabletop.
Technique: Brace as if for a plank. Slowly extend your right arm forward and left leg back to hip height, keeping hips level and trunk long — imagine balancing a tray on your lower back. Pause one to two seconds, return with control, and switch sides.
Breathing: Exhale as you extend, inhale on the return.
Beginner modification: Extend only the arm or only the leg until balance is steady.
Common mistakes: Rotating the hips open, lifting the leg above hip height, and craning the neck up. Hips stay square; the leg stays at hip height.
4. Side-Lying Hip Dip (from Knees)
Purpose: Targets the obliques and lateral stabilizers that protect your spine when you carry, bend, and twist.
Starting position: Lie on your side, knees bent and stacked, bottom forearm on the floor with elbow under shoulder, top hand resting on your hip.
Technique: Brace gently and lift your hips a few inches off the floor, forming a line from knees to head. Lower with control until your hip nearly touches down, then lift again. Complete the work interval on one side, rest, and switch sides in the next round (or split the interval if you prefer symmetry within the round).
Breathing: Exhale as you lift, inhale as you lower.
Beginner modification: Keep the bottom knee on the floor as a kickstand and lift only slightly — even small lifts train the obliques.
Common mistakes: Rolling forward or backward (stay stacked), shrugging the shoulder toward the ear, and using momentum instead of muscle.
5. Slow Bicycle Crunch
Purpose: Trains rotation through the obliques with the rectus abdominis assisting — the "twisting" function of your core.
Starting position: On your back, fingertips lightly touching the sides of your head, knees in tabletop.
Technique: Brace, then exhale as you slowly rotate your right elbow toward your left knee while extending the right leg — slow enough to feel the twist, not swing through it. Inhale back to center, then switch sides. Think "slow pedaling," roughly two seconds per side.
Breathing: Exhale on each rotation, inhale returning to center.
Beginner modification: Keep both feet on the floor and practice the rotation with knees bent and feet planted — or do a basic slow crunch instead.
Common mistakes: Yanking the head forward (hands are just resting there), racing through reps, and straightening the leg so far the lower back arches.
6. Glute Bridge March
Purpose: Connects glute strength to core stability — your hips and trunk learning to work as one unit.
Starting position: On your back, knees bent, feet flat and hip-width apart, arms resting at your sides.
Technique: Squeeze your glutes and lift your hips until knees-to-shoulders form a straight line. Holding the bridge, slowly lift one foot a few inches off the floor, set it down, then lift the other — "marching" while your hips stay level and still. Keep marching gently for the interval.
Breathing: Breathe steadily; exhale as each foot lifts.
Beginner modification: Hold a static glute bridge for the interval instead of marching — still excellent work.
Common mistakes: Letting the hips drop or rock side to side during the march, and overarching the lower back at the top. Smaller marches with level hips beat big, wobbly ones.
Cool-Down (2 Minutes)
- Child's pose — 30 seconds, breathing into your back.
- Cat-cow — 5 slow rounds, moving with the breath.
- Supine twist — knees dropped gently to each side, 20 seconds per side.
- Standing tall breath — 3 slow breaths, shoulders down, feeling the difference in your posture.
Making It Harder (When 15 Minutes Gets Easy)
Progress one variable at a time, every two to three weeks:
- Extend the work intervals — 45 or 50 seconds of work with the same rest.
- Add a third round — turning 15 minutes into about 22.
- Slow the tempo further — three seconds per rep phase on the moving exercises.
- Upgrade the holds — knee plank to full plank, knee side plank to straight-leg.
- Shorten the rests — 15 seconds between exercises instead of 20.
Soreness for a day or two after a harder session is common; sharp or joint pain is not — stop and reassess. For ideas on adding simple equipment later, see our Women's Home Gym Essentials and How to Start Strength Training for Women.
Safety Notes
- Stop any exercise that causes sharp pain, dizziness, or pelvic pressure. Muscle effort and a deep burn are normal; pain is a stop sign.
- If you are pregnant, postpartum, managing diastasis recti, or recovering from injury or surgery, get professional clearance before doing this circuit — some of these movements need individual guidance then. See a postpartum exercise guide or pregnancy exercise safety guide.
- Keep reps slow and controlled; if form breaks down, the interval is over — rest and rejoin the next exercise.
FAQ
Q: Is 15 minutes really enough for a core workout?
For most women, yes — if the minutes are honest. Six well-executed exercises with real bracing challenge the core thoroughly. Two to three sessions per week build meaningful strength; longer sessions with sloppy form deliver less.
Q: How often should I do this workout?
Two to four times per week, with at least one rest day between sessions. Your core muscles recover like any others — they need downtime to adapt and grow stronger.
Q: Can beginners do this workout?
Absolutely — every exercise includes a beginner modification, and the work/rest intervals can start at 30/30 instead of 40/20. Start with one round instead of two if needed, and build up over two to three weeks. There is no prize for finishing exhausted on day one.
Q: Do I need to warm up for a 15-minute workout?
Yes — the two-minute warm-up in this guide counts as part of the 15 minutes. Cold muscles brace poorly and fatigue faster; two minutes of marching, squats, and breathing drills makes the whole circuit feel better.
Q: Will this workout give me visible abs?
It builds the muscle underneath — its real job. What shows on the surface depends on body composition, nutrition, sleep, stress, and genetics. Train for strength and stability; results vary, and anyone promising visible abs in a fixed number of days is selling, not coaching.
Q: What if I can't do 40 seconds of an exercise yet?
Then do not — stop when your form breaks, rest, and rejoin the next exercise. Alternatively, run the whole circuit at 30 seconds work / 30 seconds rest for the first two weeks. Progress is built by finishing with good form, not by surviving with bad form.
The Bottom Line
Fifteen minutes, zero equipment, six exercises, one mat-sized patch of floor — that is all it takes to train your core completely. Brace gently, move slowly, breathe through the effort, and repeat two to three times a week. Start today, start easy, and let the stronger core come in its own time.
