A step-by-step push-up progression for women: wall, incline, knee, and full push-ups with form cues, honest set ranges, and smart modifications.
Push-Up Progression for Women: From Wall to Floor, Step by Step
The full push-up is a famously honest exercise: it will tell you exactly how much upper-body strength you have. But here is what most programs get wrong — they treat the push-up as something you either can or cannot do, when it is really a ladder of steps you can climb. The right progression lets you build the strength for a proper floor push-up over weeks or months, starting from a wall, and every step along the way is real training.
This guide lays out that ladder: six stages from wall push-ups to full floor push-ups, with exact form cues, rep ranges, and the signals that tell you when you are ready to move on. Results vary — everyone climbs at her own pace — but the method is the same for everyone: good form, steady volume, and no skipping rungs.
This guide contains affiliate links. If you buy through them, VÉLORA may earn a commission at no extra cost to you.
Why Push-Ups Are Worth the Work
A push-up trains the chest, shoulders, triceps, and core in one movement, and it demands that your whole body hold a straight line while you move — that core demand is part of why it builds such useful strength. The payoff shows up in daily life: pushing yourself up from the floor, carrying bags, moving furniture. And because each stage of the progression is a complete exercise, you get stronger from day one, not only when you reach the floor version.
Push-Up Form: The Non-Negotiables
Every stage uses the same technique, just at different angles and leverages. Get these right from the wall stage onward and they carry straight through:
- Body in one straight line. From head to heels (or knees), no sagging hips, no piking your hips toward the ceiling.
- Hands under shoulders. Fingers spread, weight through the whole hand. Keep your elbows at roughly 30–45 degrees from your body — not flared straight out, not pinned tight.
- Move as one unit. Chest and hips rise and lower together. The head is an extension of the spine — look slightly ahead, not down at your feet or up at the sky.
- Breathe. Inhale as you lower, exhale as you press. Never hold your breath through a set.
The Equipment That Helps
You do not need equipment to start, but two tools make the journey easier:
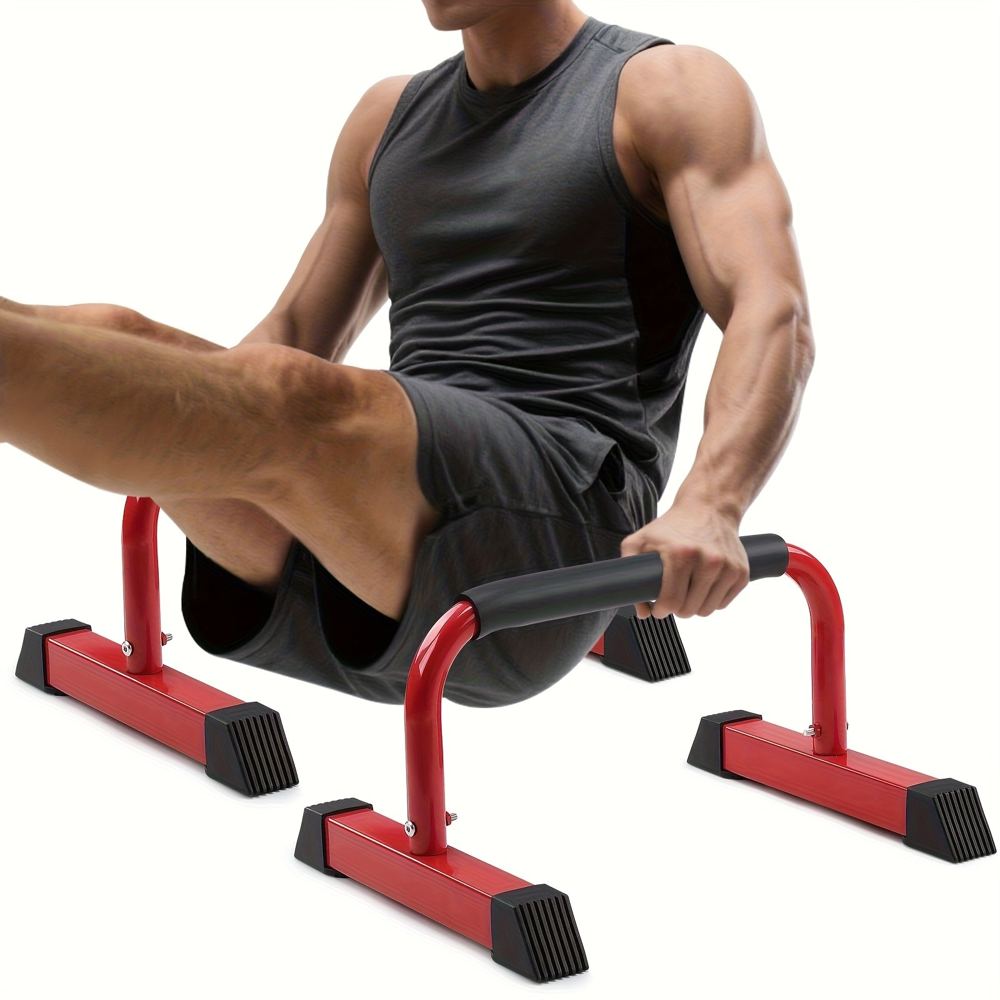
- Push-up bars. Elevating your hands slightly and keeping your wrists straighter feels kinder for many women. The 700LBS Dip Bar Push-Up Bars with EVA Handles give a stable, comfortable grip for floor-stage work.
- A cushioning surface. Knees-down stages are much friendlier on a mat. The Black Folding Gym Mat works well for kneeling push-up practice and core work. If you train at home, our upper-body workout guide shows how push-ups fit into a full routine.
The Six-Stage Progression
Work each stage 2–3 times per week, with a day of rest between sessions. Aim for 3 sets of the given rep range. Move to the next stage only when you can complete 3 sets of the top rep count with clean form — no sagging hips, no partial reps. That standard is what makes the progression work.
Stage 1: Wall Push-Up
Starting position: stand arm's length from a wall, hands on the wall at chest height, slightly wider than shoulders. Walk your feet back so your body leans toward the wall in one straight line. Technique: bend your elbows to bring your chest toward the wall, then press back. Keep your heels on the floor and your body rigid. Sets/reps: 3 sets of 12–20 repetitions. Make it harder by standing further from the wall. Why it works: it teaches the pressing pattern with minimal load, so your brain learns the movement before the load matters.
Stage 2: Countertop or Table Incline Push-Up
Starting position: hands on a sturdy countertop, table, or desk edge — hips high off the ground. The surface must be stable and heavy enough not to move. Technique: same straight-line form, lowering your chest toward the surface edge. The angle loads your upper body more than the wall. Sets/reps: 3 sets of 8–15 repetitions. Advancement tip: lower the surface over time — countertop, then a sturdy chair seat, then a low step — before going to the floor. Each step down is a genuine strength gain.
Stage 3: Knee Push-Up (Floor)
Starting position: on the floor, hands under shoulders, knees on the mat behind you, ankles crossed. Body straight from head to knees. Technique: lower your chest toward the floor with control, keeping elbows at that 30–45 degree angle, then press back up. Do not let your hips sag or pike. Sets/reps: 3 sets of 5–12 repetitions. If you cannot yet do 5 clean reps, do more sets of fewer reps (for example, 5 sets of 3) — total volume matters more than reps per set. Common mistake: "worming" the hips up first. Think of pressing the floor away while your whole body moves as one.
Stage 4: Eccentric (Negative) Full Push-Up
Starting position: in a full plank on your toes, hands under shoulders. Technique: lower your body toward the floor as slowly as you can — aim for 3–5 seconds — then drop your knees to press back up (or simply reset). The slow lowering builds the strength for the press. Sets/reps: 3–5 sets of 3–5 repetitions. Why it works: you are stronger lowering a weight than lifting it, so eccentrics let you train the full movement before you can press it.
Stage 5: Full Floor Push-Up
Starting position: plank on toes, hands under shoulders, body in a straight line from head to heels. Technique: lower until your chest nearly touches the floor, elbows tracking at 30–45 degrees, then press all the way up without the hips sagging or piking. Squeeze your glutes and brace your core throughout. Sets/reps: 3 sets of 5–10 repetitions. Congratulations — this is the classic push-up, earned honestly stage by stage.
Stage 6: Beyond the Basic (Optional)
Once 3 sets of 10 clean full push-ups feel comfortable, try tempo push-ups (3-second lowering), close-grip push-ups for more triceps, or elevated feet. There is always a next rung; the progression mindset does not stop.
| Stage | Position | Target | | --- | --- | --- | | 1 | Wall | 3 × 12–20 | | 2 | Countertop incline | 3 × 8–15 | | 3 | Knee push-up | 3 × 5–12 | | 4 | Eccentric full | 3–5 × 3–5 | | 5 | Full floor push-up | 3 × 5–10 |
Accessory Work That Speeds Things Up
Push-ups get easier when the supporting muscles are stronger. Twice a week, add one or two of these:
- Plank holds. 3 sets of 20–40 seconds. Builds the rigid body line every push-up stage needs.
- Bench or chair dips. Use a sturdy surface — the MBB Sit-Up Push-Up Bench doubles as a dip station. 3 sets of 8–12, knees bent to make it easier.
- Dumbbell chest press and rows. Light pressing and rowing strengthen the same muscles through different angles. Our dumbbell guide helps you pick the right weights, and our strength training starter guide shows how to program these alongside push-up practice.
Common Mistakes to Fix Early
- Flared elbows. Elbows straight out to the sides put extra strain on the shoulders. Aim for 30–45 degrees from your torso.
- Sagging hips. Almost always means your core is the weak link, not your arms. Drop back one stage and add plank work — no shame in it; that is the progression working.
- Partial range of motion. Half reps build half strength. Lower until your chest nearly touches the floor or the surface you are pushing from, every rep.
- Rushing. Fast, bouncy reps hide weakness. Control the lowering; the muscle you feel most during the slow part is the one getting stronger.
Safety Notes
- Warm up your shoulders and wrists before push-up sessions — arm circles, shoulder rolls, and a few wrist circles.
- Wrist discomfort is common: try push-up bars or a slightly narrower hand position, and do not push through sharp wrist pain. If pain persists, check with a physiotherapist.
- Pregnant or recently postpartum women should follow their provider's guidance on core and prone-position exercise before working through this progression.
FAQ
Q: How long does it take to get a full push-up?
It depends entirely on where you start — anywhere from a few weeks to several months is completely normal. What matters is training each stage 2–3 times weekly and only advancing when you can do the top of the rep range with clean form. Skipping stages to get there faster usually stalls you instead.
Q: Are knee push-ups "real" push-ups?
Yes — knee push-ups are a legitimate, load-bearing training stage, not a consolation prize. They build the exact pressing muscles and patterns the full push-up needs. Most people who reach full push-ups earned them through the knee stage. The only version that does not count is the one with broken form.
Q: Should I do push-ups every day?
No. Your muscles and connective tissue adapt during rest, not during training. Two to three sessions per week with rest days between them is the right frequency for this progression, especially at the knee and full stages.
Q: Can push-ups replace a full upper-body workout?
They cover the pushing pattern well, but a balanced upper body also needs pulling — rows, for example — to keep the shoulders healthy and posture balanced. Think of push-ups as one pillar of upper-body training, not the whole building. Our upper-body workout guide puts the pieces together.
Q: My shoulders click during push-ups. Is that okay?
Painless clicking is common and usually not a concern. Pain — sharp, aching, or lingering after the set — is different and worth having checked by a professional. Keep the elbows at 30–45 degrees and never push through shoulder pain.
The Bottom Line
The push-up is not a test you either pass or fail — it is a staircase, and you can start on the step you are on today. Master the wall, graduate to the incline, earn the knee version, train the negatives, and the floor push-up will arrive as a natural result rather than a struggle. Work the progression two or three times a week, respect the rest days, and trust the process: the woman who does twenty clean knee push-ups is already stronger than the one skipping straight to sloppy full ones.
